We repaired a damaged parking lot floor that had numerous cracks, dents, and corrosion of the reinforcement. The goal was to restore a smooth, durable, and easy-to-maintain surface that would be resistant to salt, water, oil, and everyday wear and tear.
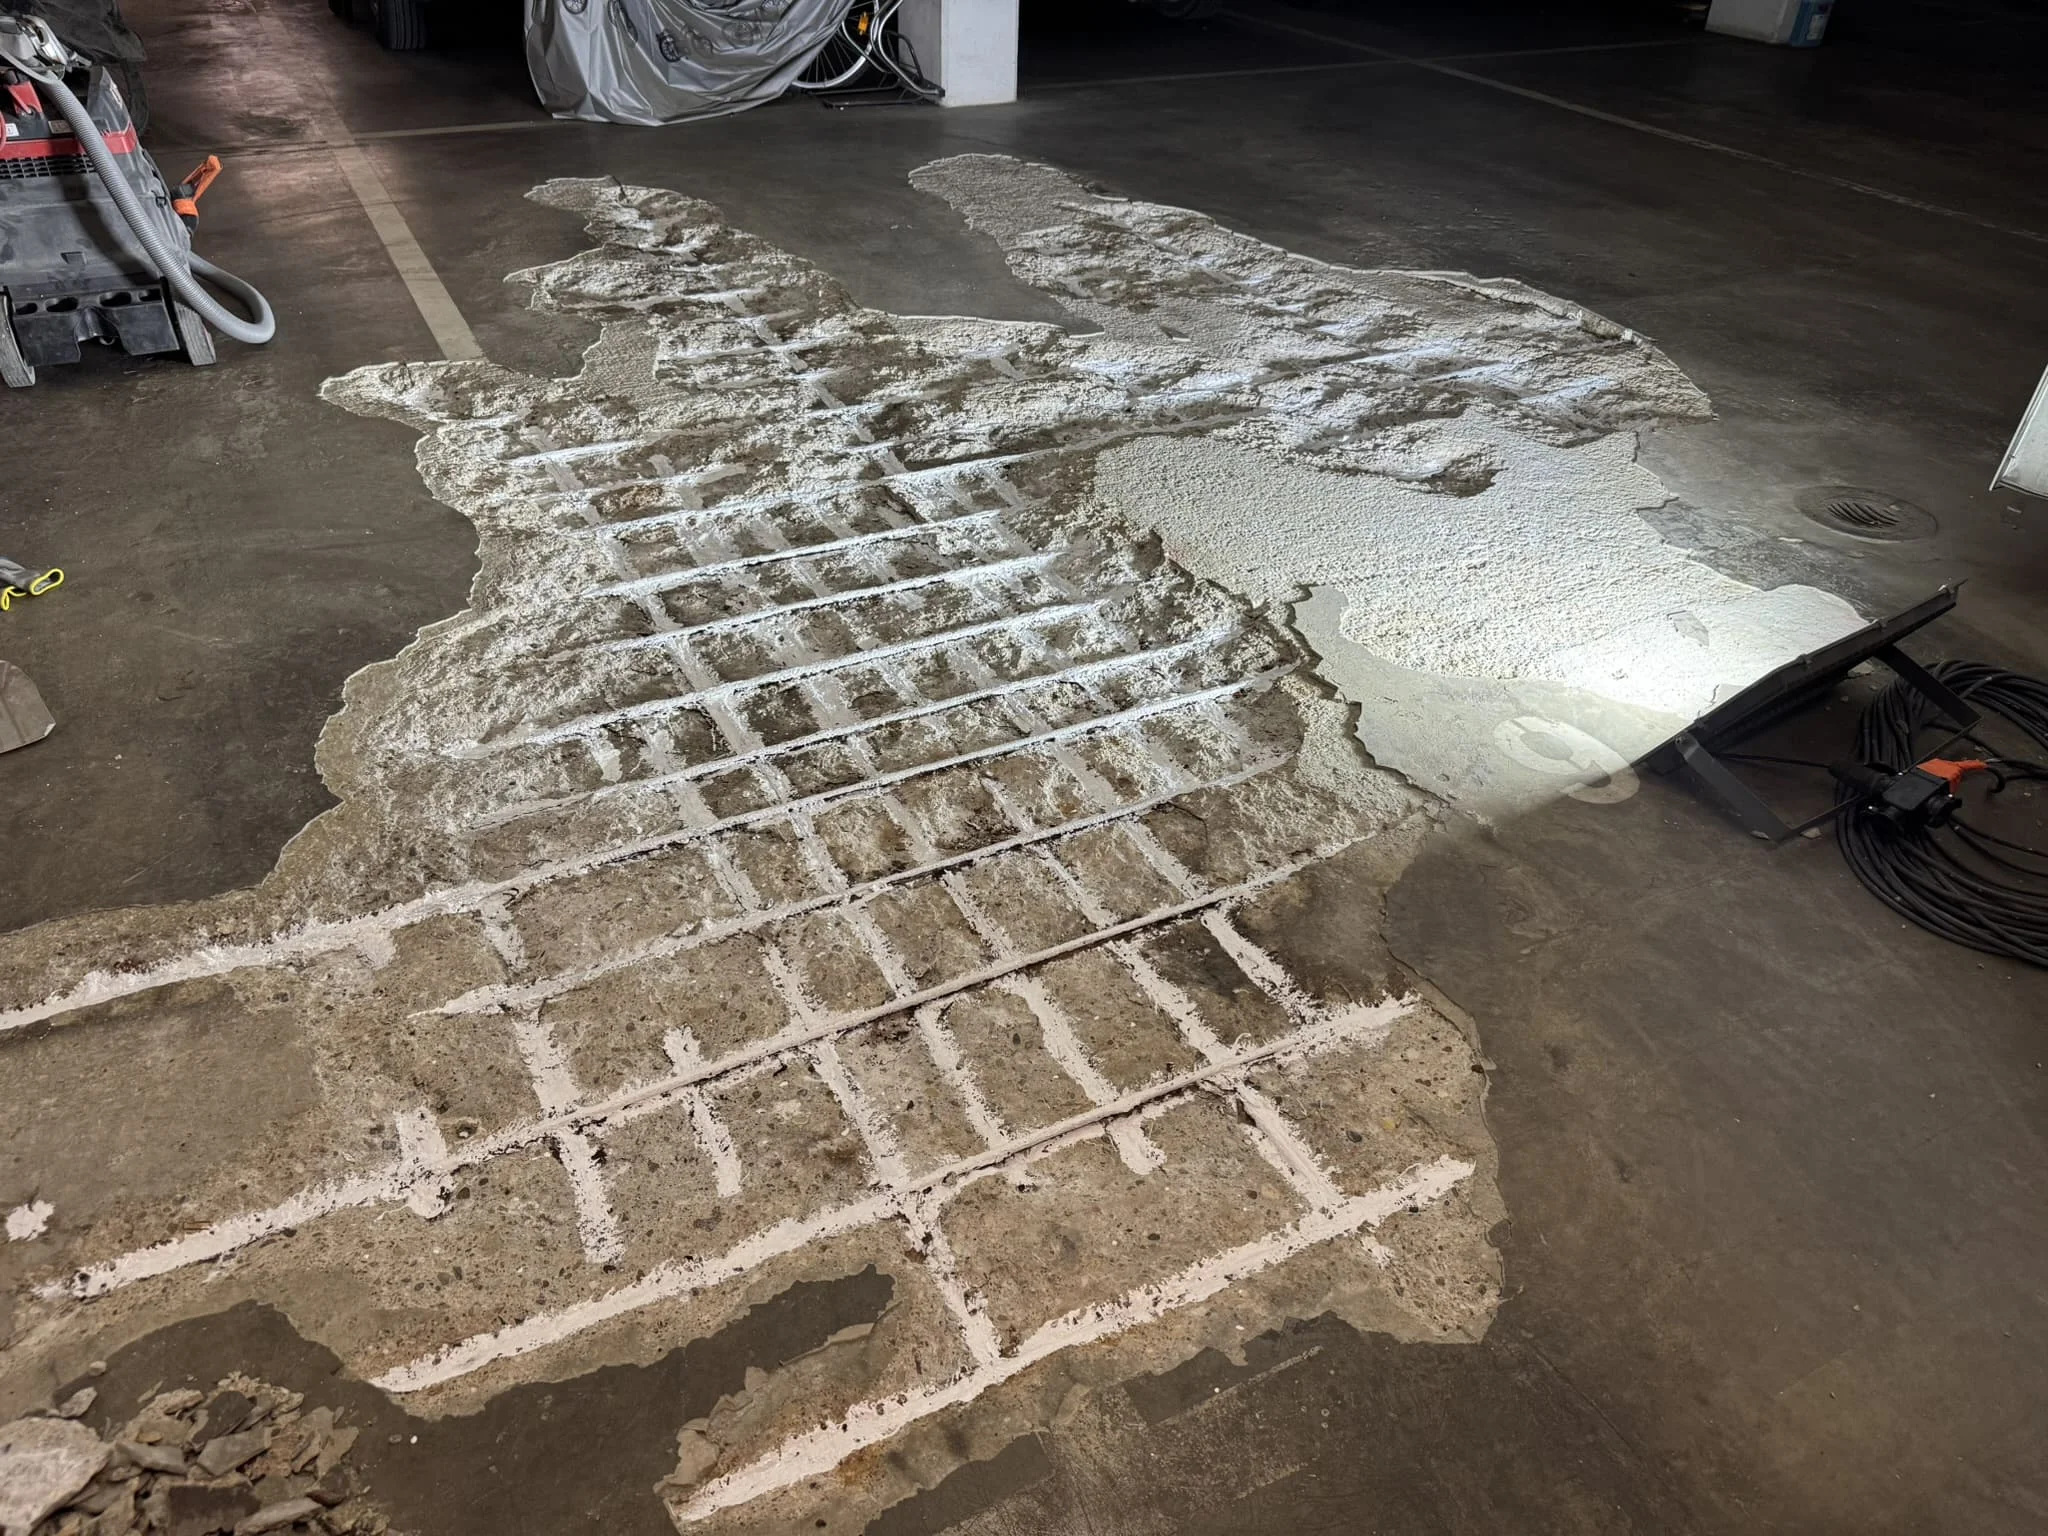
Removing loose concrete
We started by thoroughly removing everything that wasn't adhering well to the substrate: loose concrete, brittle edges, and remnants of old coatings. We used hammers and mechanical tools. This step is crucial in floor repair – the new layers must "sit" on a solid base, otherwise they will quickly become detached.
Removing rust from reinforcement
In areas of the industrial floor where reinforcement (steel rods in concrete) was exposed, we thoroughly removed rust using brushes and sandblasting/grinding tools. The cleaned steel has a bright, metallic color. This stops corrosion from developing and protects the structure.
Coating the reinforcement with an anti-corrosion agent
We applied an anti-corrosion agent to the cleaned steel. This creates a protective barrier that blocks moisture and salts, and also improves the adhesion of subsequent layers of parking lot repair. It's an investment in the longevity of the repair.
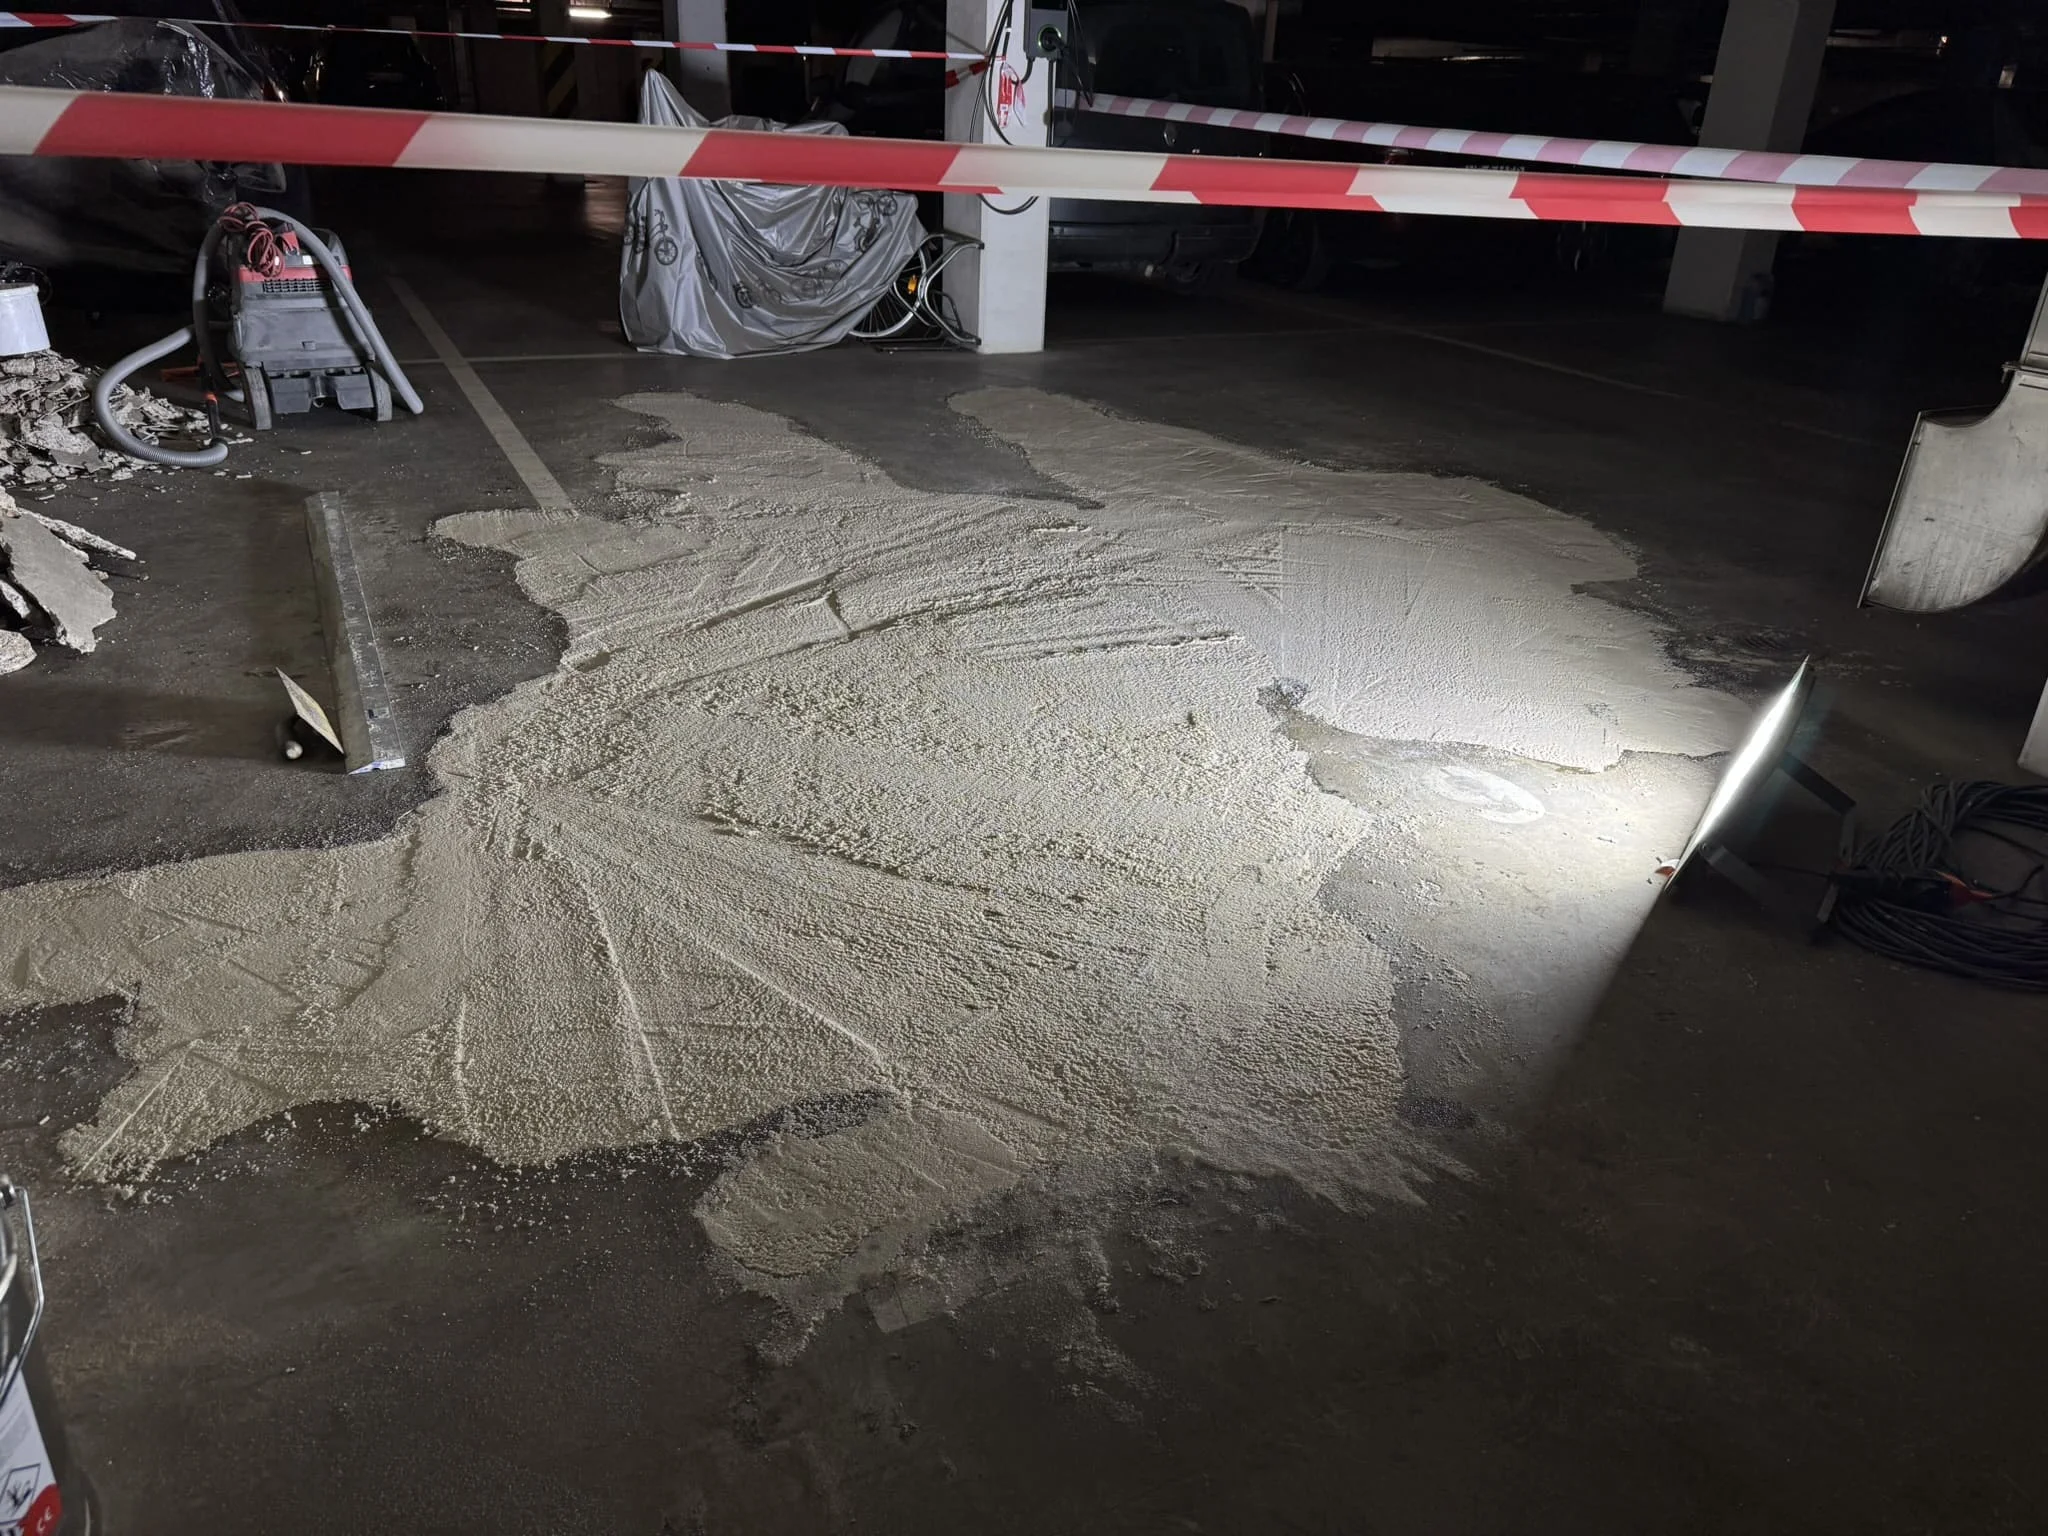
Epoxy resin priming
The entire repaired area was then primed with epoxy or polyurethane resin floors. The primer penetrates the concrete pores, strengthening it, and binding fine dust. It also provides an ideal "adhesive base" for subsequent layers. After priming, we waited the required time for the resin to partially cure.
Laying epoxy screed with sand
On this prepared substrate, we applied a screed of epoxy resin with the addition of quartz sand, as we do for thin-layer commercial cement floors. This mixture creates a strong, abrasion-resistant repair layer that fills gaps and strengthens the entire surface. The sand adds rigidity and slip resistance.
Leveling the screed with a grinder
After the screed had hardened, we moved on to mechanical grinding of the concrete. This eliminated minor irregularities, joints, and "hills," leaving the surface even and ready for finishing. This step improves driving comfort and the floor's appearance.
Filling the screed with epoxy putty
We filled the micro-holes left by milling the concrete, pores, and cracks with epoxy filler. This precise finish seals minor imperfections and prepares a smooth base for the final system. This prevents the final layer from "copying" the substrate's imperfections.
Priming the parking lot surface
Before the final stage, we primed the entire surface again, this time with a primer compatible with the self-leveling system. This ensures even better adhesion, even spreading, and extends the life of the polished concrete coating.
Laying a self-leveling epoxy system
Finally, we applied a self-leveling epoxy coating to repair the parking lot floor. This smooth, tight, and aesthetically pleasing coating self-levels and creates a uniform, easy-to-maintain surface. It's resistant to vehicle traffic, oil stains, water, and de-icing agents. Additionally, parking space and lane markings can be painted.
Time and conditions of work
Each stage required sufficient drying and curing time for the parking lot repair. Depending on temperature and humidity, the intervals ranged from several to several dozen hours.
Full traffic loading is usually permitted 2-3 days after the final layer has been applied (faster in warmer conditions, slower in colder conditions).
During the works, there was noise (grinding) and periodically the smell of resins - the area was ventilated, and zones secured with tapes such as safety barriers protect the walls and driveways.
The final effect
Even, tight and durable coating after parking lot floor repair, without any defects or dusting. Better resistance to water, salt, and petroleum products. Easier cleaning and reduced risk of puddle formation. Aesthetically pleasing appearance and clear marking of areas.
Usage recommendations
Avoid sharp turning of the wheels in place during the first week after the industrial concrete floor is put into service.
Quickly remove aggressive contaminants (oil, fuel). Periodically wash the surface with mild cleaning agents. If you notice any localized damage, report it for prompt repair before the problem escalates.
The parking lot floor repairs were completed in stages, from reinforcing the base to a new, self-leveling epoxy coating. This provided the parking lot with a solid, safe, and aesthetically pleasing surface that will last for years of daily use.


