Repairing cracks in industrial floors – a simple user guide
Industrial floors endure a tough life. Forklifts drive over them, racks carry tons of goods, and they're exposed to impact, vibration, chemicals, and extreme temperatures. Even the best-made concrete can develop cracks and fissures over the years.
The good news is that most of them can be safely and effectively repaired, leaving your floor smooth and strong again. Below, you'll find a friendly explanation of where cracks come from and a step-by-step guide to repairing them, including widening the crack, installing metal cross clamps, filling with industrial flooring epoxy resin, and final sanding.
Where do cracks come from?
Concrete shrinkage and drying too quickly – fresh concrete shrinks during setting. If it hasn't been properly cared for (sprinkling, foils, curing agents) or dries too quickly, shrinkage cracks appear, requiring repair of cracks in industrial floors. Lack of or poor expansion joints – the floor needs joints to accommodate slab movement. If these joints are missing or poorly designed/maintained, stresses find their way out through cracks.
Weak or uneven subfloors – if there are voids beneath the slab, settled ballast, or moisture has washed away the ground, the slab will sag under the weight and crack. Heavy loads and impacts – constant wheel impacts, pallet drops, and machine vibrations – cause concrete fatigue, micro-cracks, and, ultimately, visible cracks.
Temperature changes – concrete expands and contracts. Extreme fluctuations (e.g., halls with gates opened in winter) further "work" it. Construction errors – too much water in the mix, too thin a slab, lack of dispersed reinforcement, poor maintenance – all of these weaken the floor.
Steel corrosion – if the reinforcement is working in the crack zone and moisture has entered, corrosion can “push” the concrete apart.
Note: a crack is not the same as an expansion joint. An expansion joint is a planned gap that is filled with a flexible floor repair material. We repair cracks "rigidly," but we do not "fill" the expansion joint with epoxy resin, because the floor must have room to move there.
Does every crack need to be repaired?
Thin hairline cracks (up to about 0.3 mm) are often merely aesthetic. If they don't spread or release dust, observation or surface sealing will suffice. These types of cracks often become visible when thin-layer commercial cement floors become wet.
We repair open cracks (1–5 mm) through which dust or water enters or which rattle under the wheels.
Wide cracks (5–8 mm), level differences, sunken areas, and "wet" cracks (constant moisture) should be assessed by a specialist. Substrate stabilization (e.g., subfloor injections) may also be necessary before repairing cracks in industrial floors.
What will be needed for repair
Angle grinder for grinding concrete or a diamond-cutting machine with a crack chaser. Industrial vacuum cleaner, wire brush, compressed air. Drill and disc/groove cutter for cutting out sockets for staples. Trowel, putty knife, low-speed mixer. Spirit level, chalk/marker, tape measure.
Metal staples/crack sealers for industrial floor crack repair (usually steel, stainless steel, or composite), designed for concrete. "Cross" – installed crosswise across the crack.
Low-viscosity (thin) epoxy resin to fill the gap itself, thicker (gel) or epoxy mortar to embed the clamps and fill the slots. Optionally, quartz sand to "thicken" the resin in larger gaps and for anti-slip topping. Painter's tape to protect edges. Tool solvent (recommended by the resin manufacturer).
A dust mask (preferably with a P3 filter), goggles, nitrile gloves, earmuffs, and work clothes. Concrete dust and resin fumes are no joke. Ensure good ventilation and dust extraction. And let's not forget about safety in industrial facilities – use safety barriers.
Working conditions
The substrate and air temperature should typically be 10–25°C (check the resin's technical data sheet). The substrate should be dry and clean. Standard epoxies are moisture-intolerant, while some specialized resins tolerate higher humidity – confirm which resin you have. Stop traffic in the repair area until fully cured.
1. Assessment and delineation
Mark the crack's course with chalk. Check whether the crack is "living" (or working). You can apply a small plaster "filling" or mark its width with a marker and check for a few days. If the crack is noticeably widening, call a specialist – the problem may be in the subfloor.
Plan the location of the clamps, typically every 30–60 cm along the floor crack repair, and also closer to particularly stressed areas (traffic areas, crack intersections). Do not place the clamps too close to the edge of the slab (at least 10–15 cm).
2. Widening the crack with a special disk
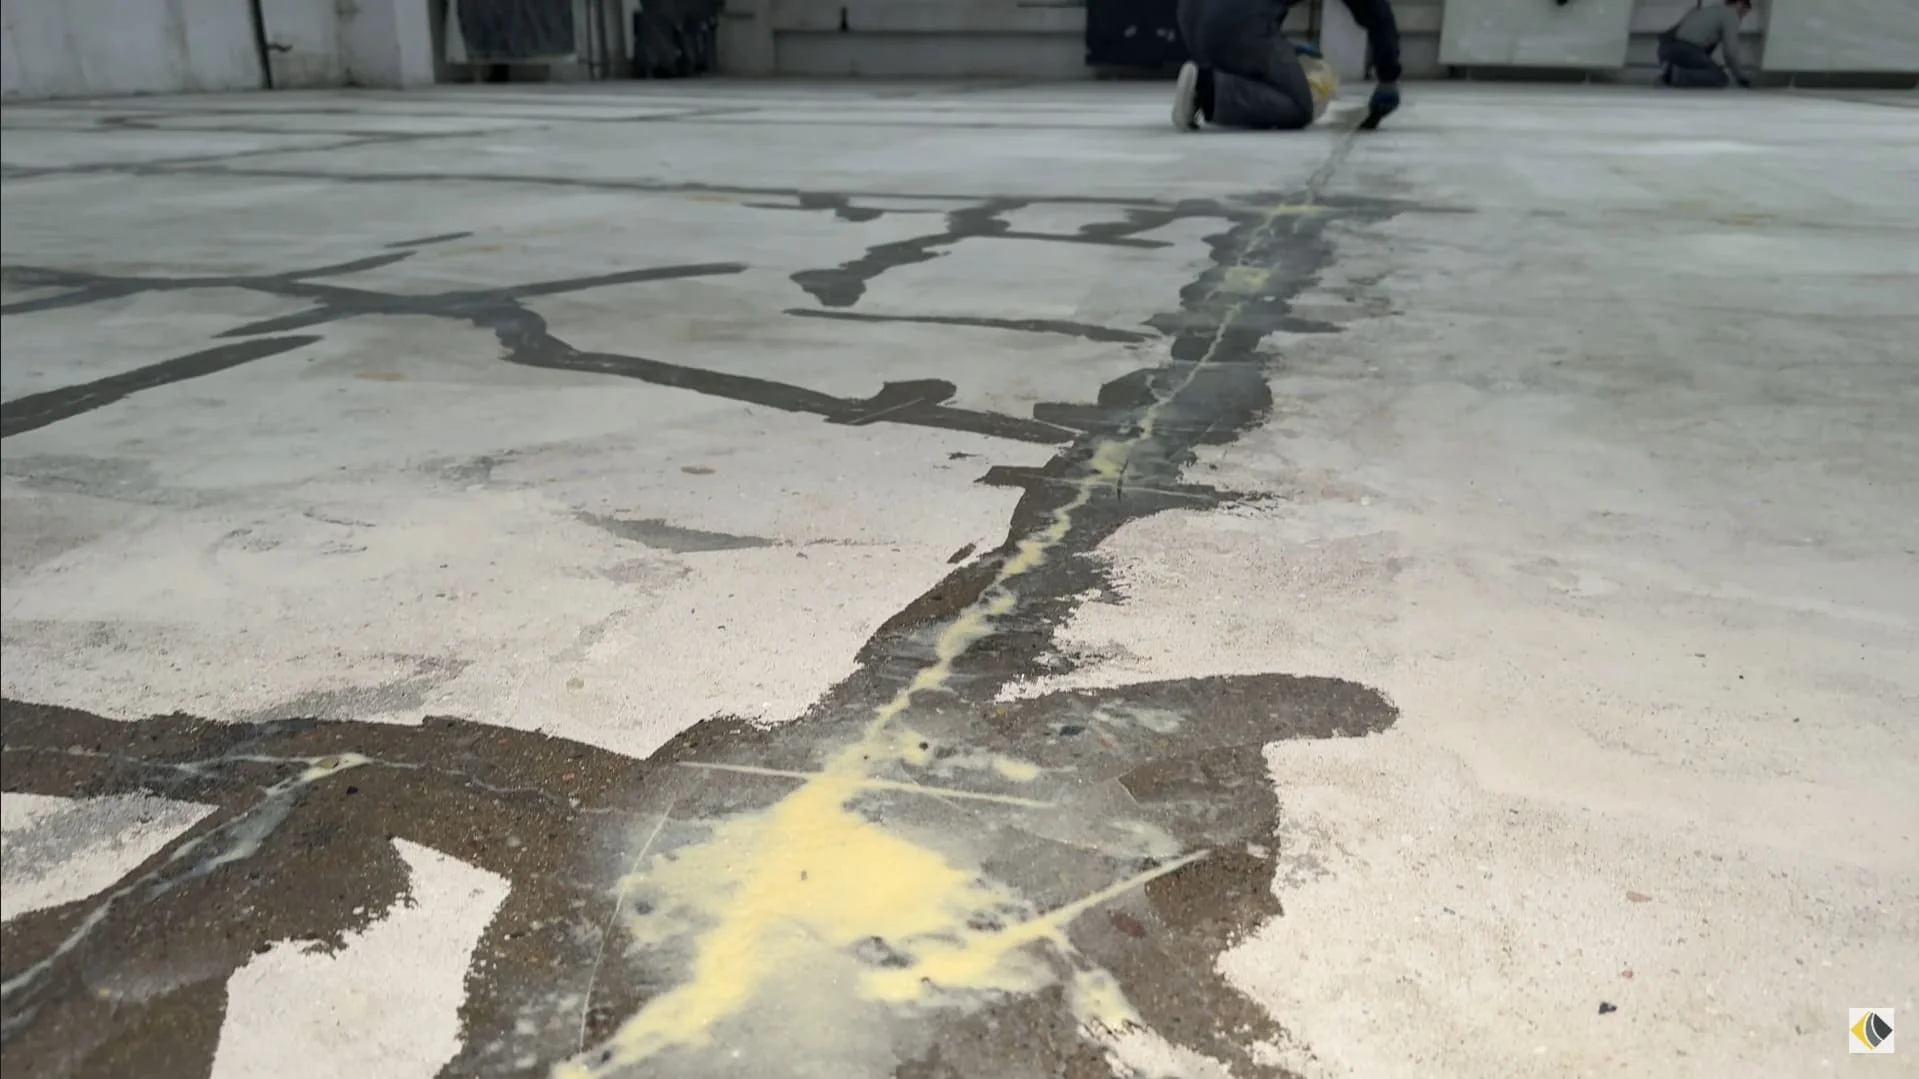
Use a diamond crack/crack disc to "open" the crack into a V or U shape. The width after widening should be approximately 8-15 mm, and the depth should be 10-20 mm (enough for the resin to flow well and "bond" the walls).
Make your cuts evenly along the crack line. If there are any branches, open each one. Thoroughly vacuum, brush, and blow out any dust. The cleaner the crack walls, the better the resin will adhere.
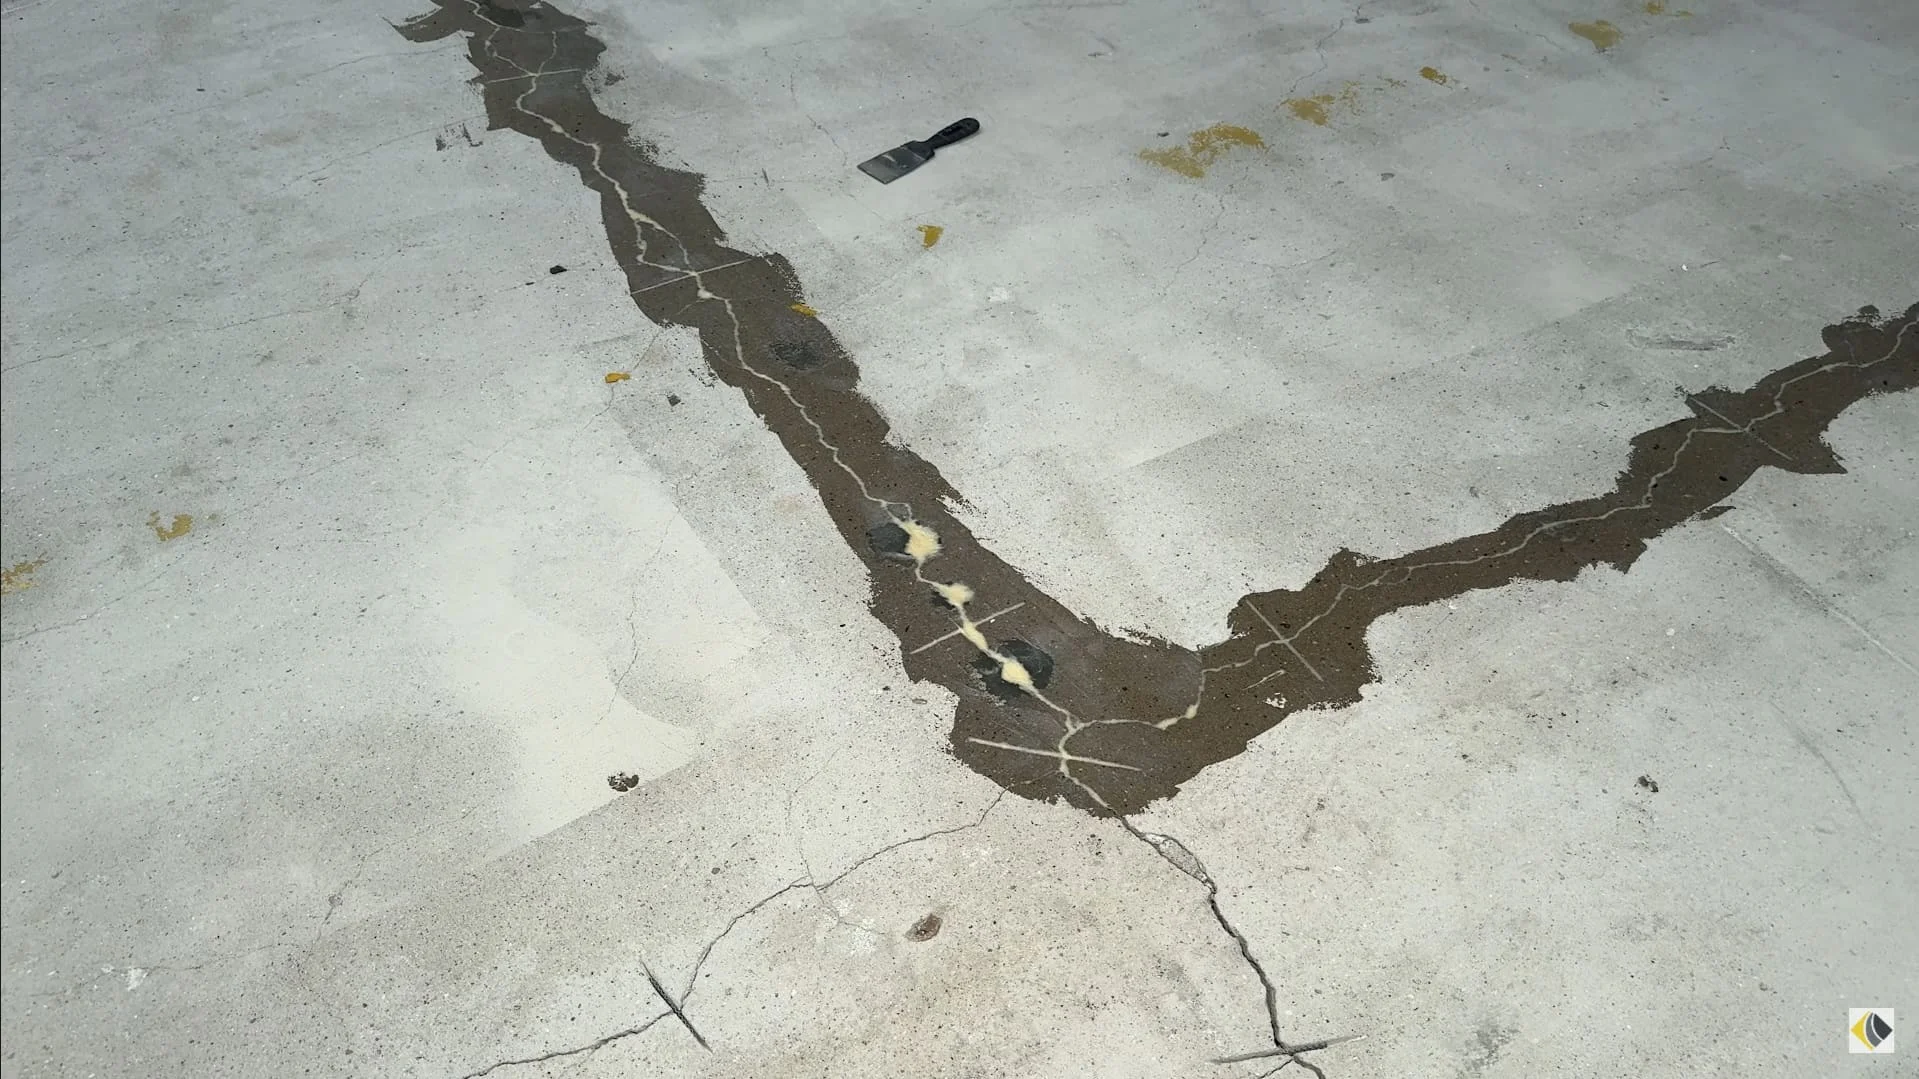
3. Making sockets for metal clamps (cross clamps)
Every 30–60 cm, cut transverse slots through the crack in the concrete industrial floor, at a 90° angle to the crack line. Match the slot dimensions to the clamp type (typically 10–20 mm wide, 20–30 mm deep, 120–200 mm long, so that the clamp lies freely and is completely covered with resin). For a stronger "stitching," many crews install two clamps at an angle, creating an "X" (crosswise to the crack). These cross clamps stabilize the slab, limiting further edge spreading.
If you're using U-shaped clamps installed in pre-drilled holes, drill two holes on either side of the crack according to the manufacturer's recommendations. Again, thoroughly vacuum the sockets and the crack gap.
4. Placing the clamps
Prepare epoxy resin in gel version or epoxy mortar for repairing cracks in industrial floors (according to the technical data sheet – measuring the ingredients, mixing).
Fill the bottom of the socket with a thin layer of resin, insert the clamp, and press it down until its top edge is 3–5 mm below the floor level (so you can sand it evenly later). Fill the socket with resin/resin with quartz sand, ensuring there are no air bubbles. Remove any excess with a spatula. Give the resin a moment to settle.
5. Filling the crack itself with epoxy resin
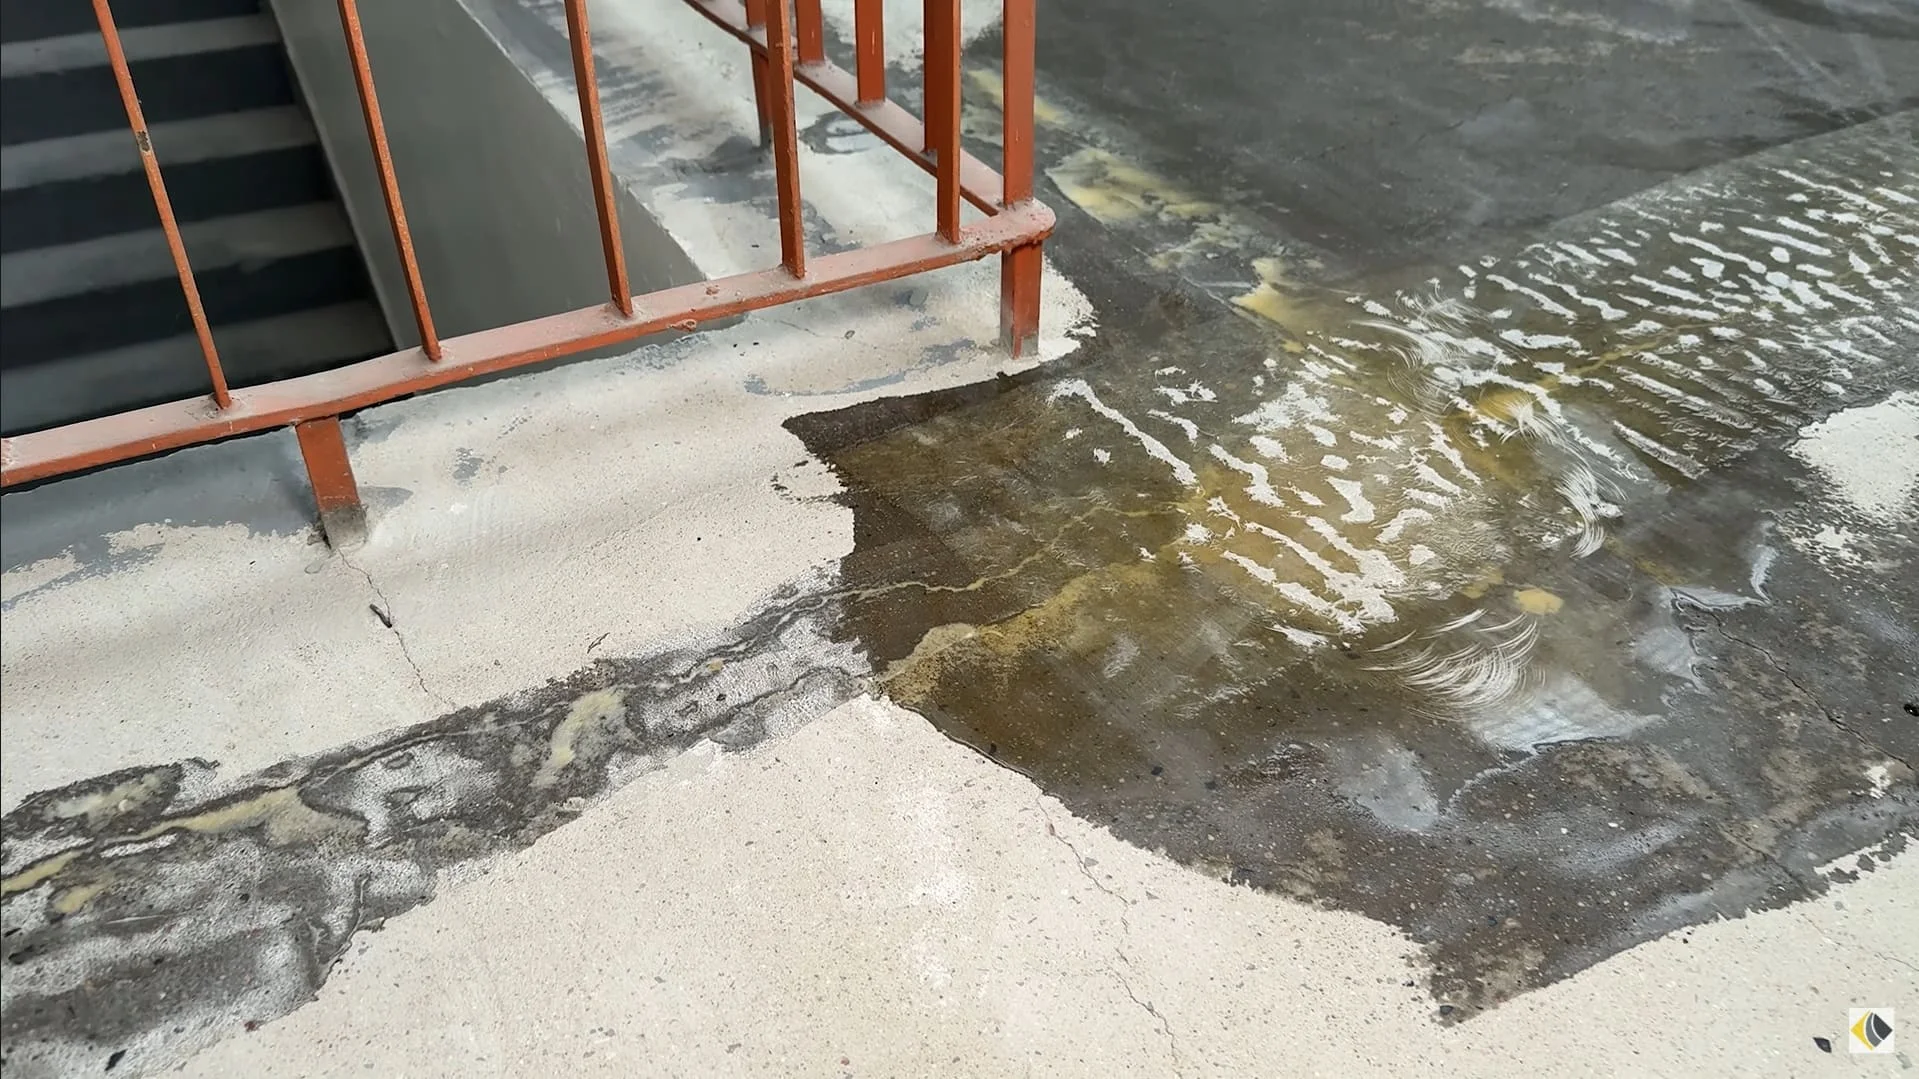
Use a low-viscosity (thin) penetrating epoxy resin for the crack. Pour or pump the resin along the crack in small increments until it begins to "settle" in the crack (stops soaking in). Repeat after a few minutes if necessary.
For larger gaps, you can compact the fill with dried quartz sand – gently sprinkle it into the resin, then cover it with a thin layer of resin. This provides greater resistance and reduces resin shrinkage.
Note: do not fill the active expansion joints with rigid resin – these places are filled with flexible material.
6. Hardening
Epoxy curing time depends on the product and temperature, typically 4 to 24 hours for light foot traffic and 12 to 48 hours for full vehicular traffic. Check the product data sheet. Until then, close the area off-limits.
7. Sanding and finishing
Once fully cured, sand the repaired areas so they are flush with the floor. It's best to use a concrete grinder for polished concrete or a diamond grinding disc for roughing. Vacuum and, if desired, finely dust the fresh, thin layer of resin on top with quartz sand – this reduces slippage and smooths the look of the repair. If the floor has a sealer or varnish, re-sand it locally after sanding to even out the appearance and make cleanup easier.
Practical tips
Cleanliness is key – most failed industrial floor crack repairs are caused by dust and grease in the crack. Vacuuming and degreasing (if necessary) before pouring the resin is essential. Don't work "cold" – at low temperatures, the resin thickens and penetrates poorly. At too high temperatures, it sets too quickly. Secure the edges with tape – this will help keep the edges clean and reduce sanding later.
Color – Epoxy is usually darker than concrete. If appearance is important, plan to lightly sand or mill the concrete over a larger area, or paint the service strip. Don't rush the move – forklifts using fresh resin are the easiest way to damage the repair.
The most common mistakes
"Potting" the crack without cutting it – this rarely works for long; dirt and dust will break the adhesion. No staples – with working cracks, the edges continue to separate. Staples stabilize the crack line.
Repairing expansion joints industrial flooring "rigidly" ends up with new cracks nearby. Working on wet concrete – epoxies usually don't like it, and it will cause blisters or delamination. Too sparse placement of clamps – saving a few pieces will pay off later.
When to call a specialist?
Wide, step-like cracks (level difference), persistent dampness, collapsed zones, tens of meters long, cracks in column and foundation areas. Substrate diagnostics, injection stabilization (polyurethane/cement), or structural repair may be necessary before floor crack repair.
How to prevent further cracks
Take care of expansion joints – cut and fill in flexible material, preventing edges from crumbling. Control point loads – place pads under the shelves and distribute the weight.
Regular sweeping and vacuuming – fine sand acts like sandpaper under the tires. Limit harsh impacts – drive-on ramps, rubber sill covers. Ensure proper drainage – water penetrating cracks accelerates deterioration.
Summary
Repairing cracks in industrial floors doesn't have to be complicated. The key is a good diagnosis, clean preparation, the use of cross clamps (clamps) where the crack is "working," and a solid filling with epoxy resin. Finally, even sanding and you'll have a durable, smooth surface. However, if the crack is related to subfloor settling or is very wide, it's best to consult a specialist to avoid treating the effects without addressing the cause. This will ensure your floor lasts for many years, free from knocks, bumps, and maintenance issues.


